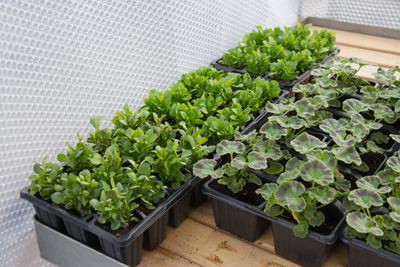
Gardening with Bubble Wrap
There are so many ways to repurpose bubble wrap in the garden. For instance, many of us live in climates where temperatures dip during winter months. What better way to protect sensitive plants from the ravages of cold temperatures than with bubble wrap? If you don’t already have some on hand, it comes in easy to handle rolls. It can be stored and reused year after year. Plants grown in containers are more sensitive to cold than those growing in the ground so they need protection. Sure, you can build a wire cage around a tree or plant and then fill it with straw to protect it from frost, but an easier way is to use bubble wrap. Simply wrap the bubble wrap around container grown plants or other sensitive plants in the garden and secure it with twine or rope. Citrus trees are popular specimens, but the problem is what to do with them during the winter when temperatures dip. If they are in a pot and small enough, they can be overwintered indoors, but larger containers become an issue. Again, using bubble wrap to protect the trees is an easy solution that can be reused year after year.
Other Bubble Wrap Garden Ideas
Bubble wrap can also be used to insulate tender veggies when a cold snap looms. Place garden stakes around the perimeter of the vegetable bed and then wrap bubble wrap around them. Staple the bubble wrap to the stakes. Secure another piece of bubble wrap over the top of the bubble wrapped bed. Basically, you’ve just made a really quick greenhouse and, as such, you need to keep an eye on it. Once the threat of frost has passed, take the top bubble wrap off; you don’t want the plants to overheat. Speaking of greenhouses, in lieu of a traditional heated greenhouse, you can give a cold frame or unheated greenhouse structure added insulation by lining the inner walls with bubble wrap. Bubble wrap and plants may be a perfect partnership, protecting the plants from frigid temps, but you can also use bubble wrap to kill unwanted soil borne pests and weeds. This process is called solarization. Basically, how the process works is by using natural heat and light to kill nasty organisms such as nematodes and eelworms or unwanted perennial or annual weeds. It is an organic method of control successful in eradicating the unwanted pests without the use of chemical controls. Solarization means covering the area being treated with a clear plastic. Black plastic doesn’t work; it doesn’t allow the soil to heat up enough to kill the pests. The thinner the plastic the more heat can permeate but, unfortunately, the more easily damaged the plastic will be. This is where bubble wrap comes into play. Bubble wrap is thick enough to withstand most of what Mother Nature can throw at it and it is clear, so light and heat will penetrate and warm the soil enough to kill off weeds and pests. To solarize an area, make sure it is leveled out and clear of anything that might tear the plastic. Rake the area free of plant debris or stones. Water the area thoroughly and allow it to sit and soak up the water. Place a soil or compost thermometer into the prepared soil. Cover the entire area with the bubble wrap and bury the edges so no heat can escape. The temperatures need to exceed 140 F. (60 C.) to kill weed seeds or pests. Do not poke the thermometer through the plastic bubble wrap! That would create a hole where heat could escape. Leave the plastic in place for at least 6 weeks. Depending upon what time of year you solarized and how warm it has been, the soil should be sterile at this time. Amend the soil with compost to add nutrients and beneficial bacteria prior to planting.
